Practice
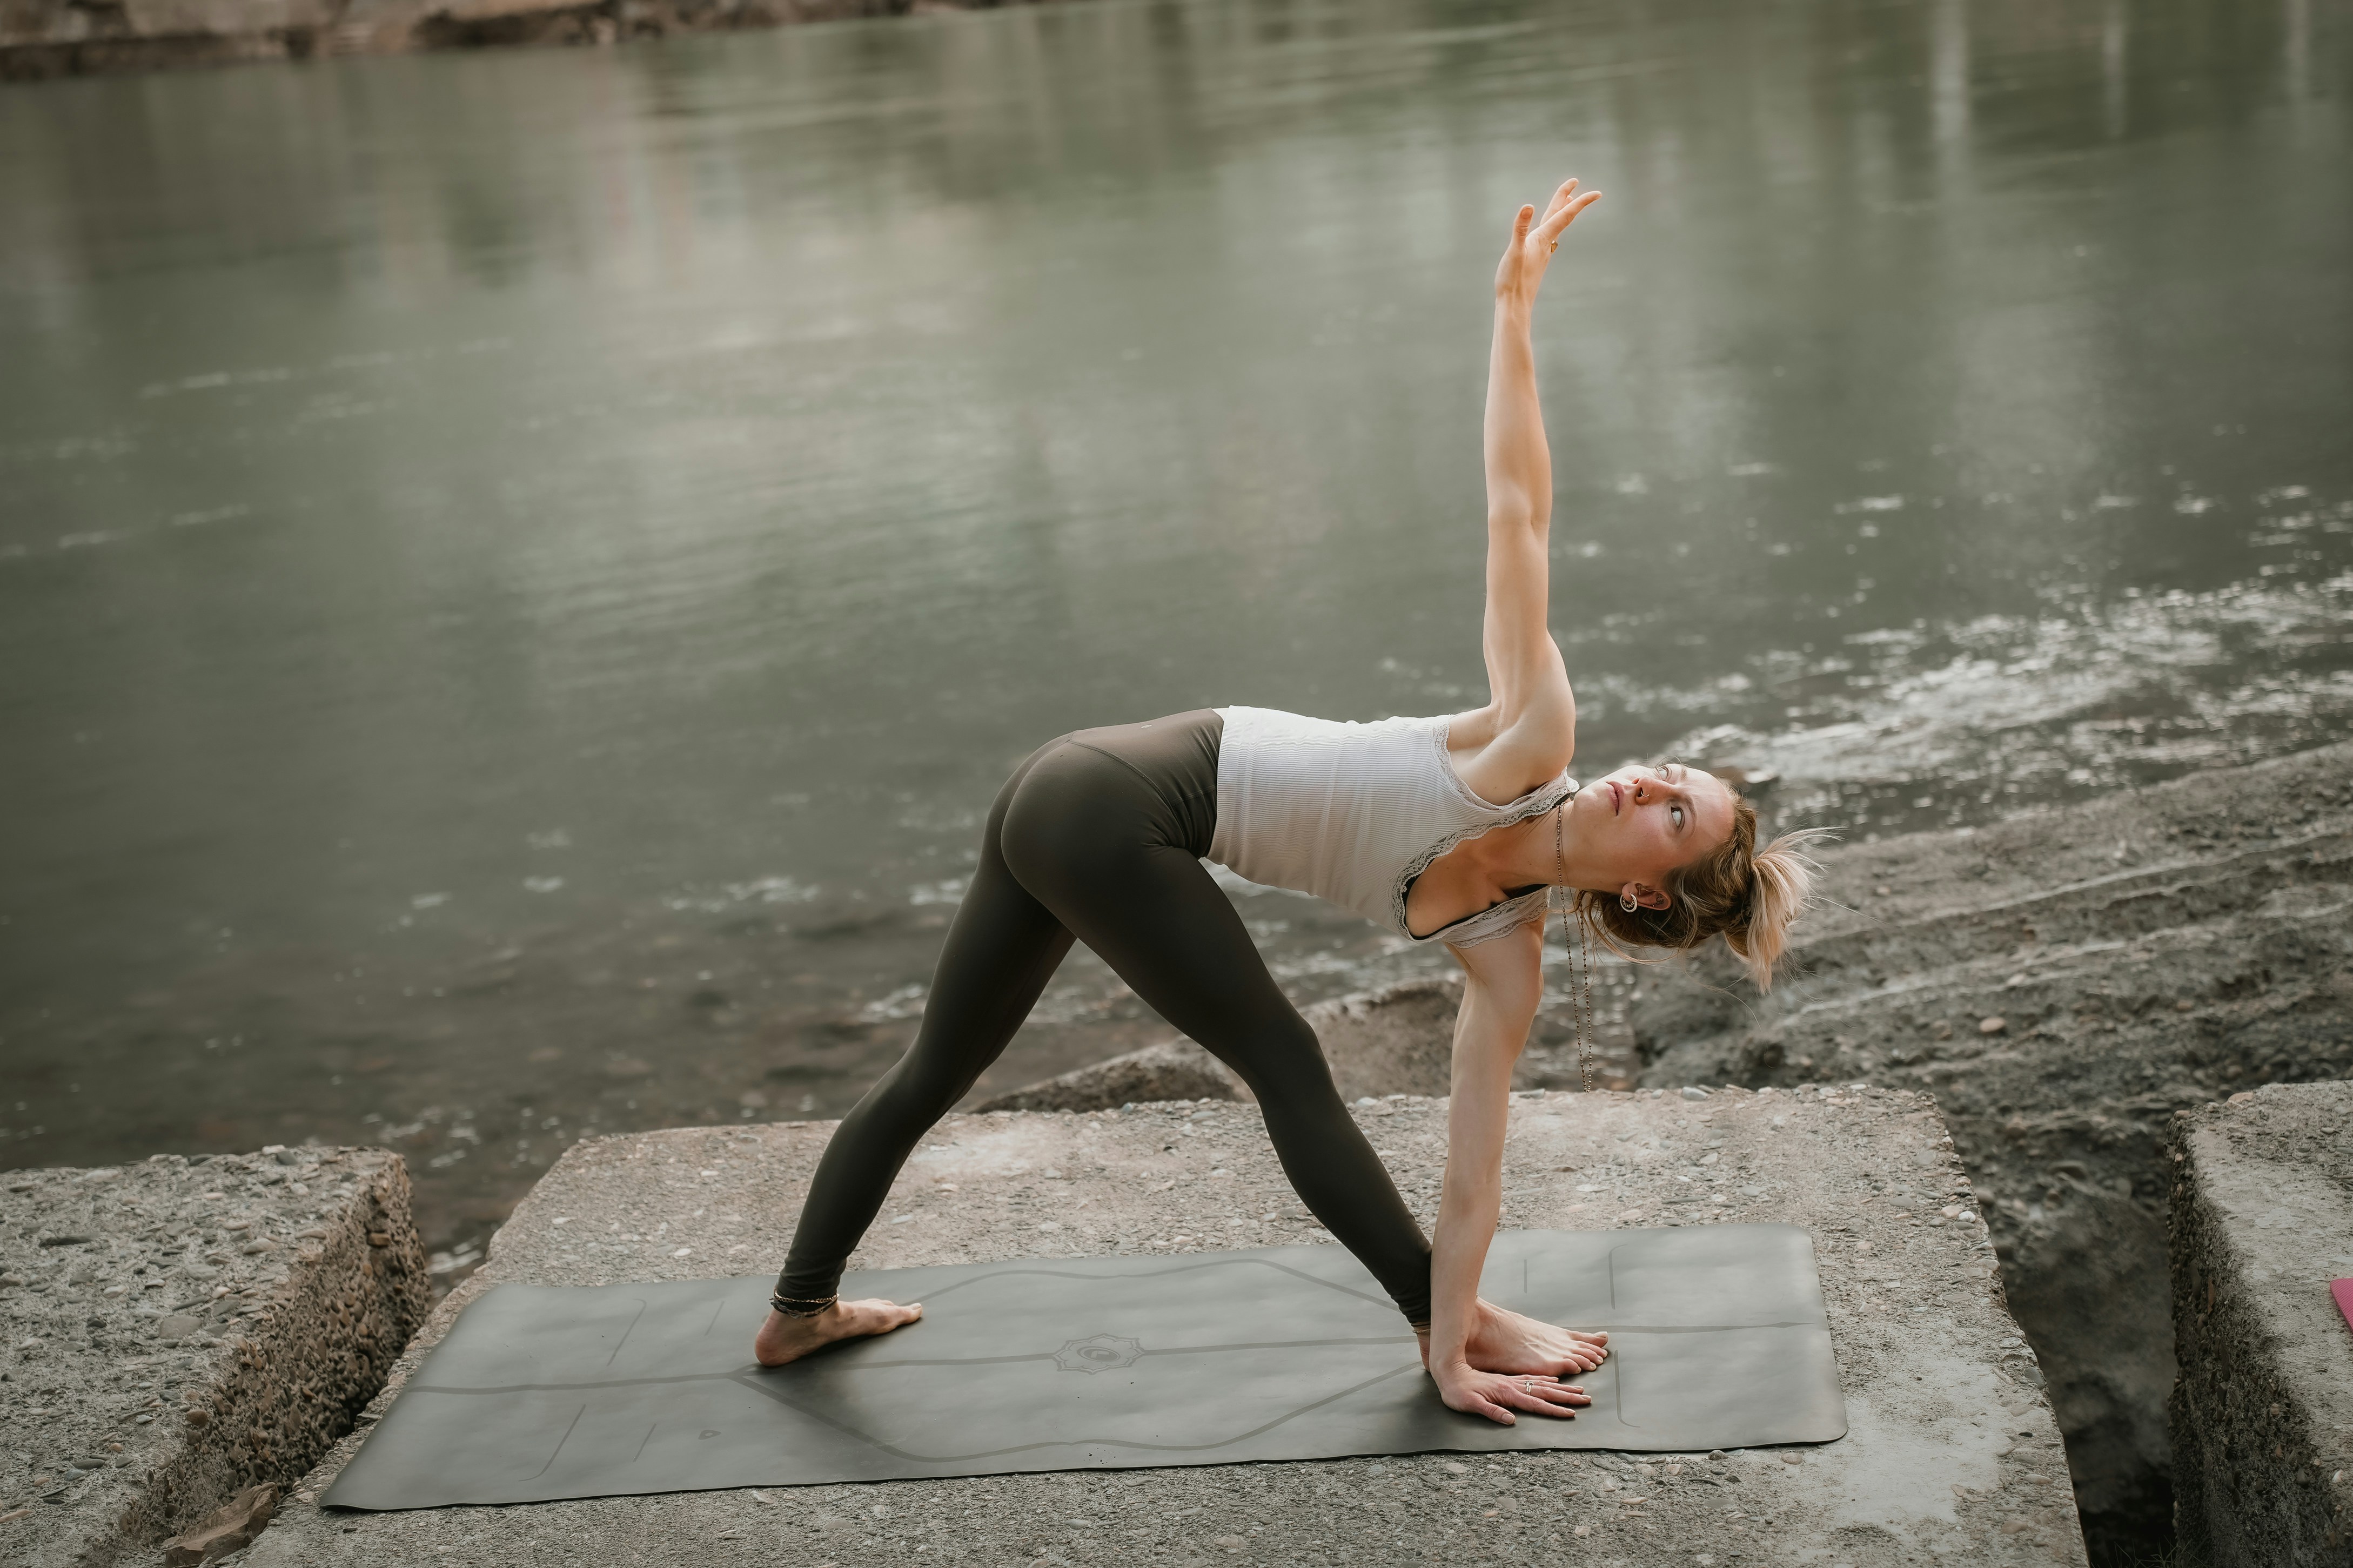
Trikonasana: A Deep Dive into the Triangle Pose in Yoga
Yoga has always been a way for me to reconnect with my body and mind. Among the many poses I’ve learned, Trikonasana, also known as the Triangle Pose, holds a special place in my practice. It’s a foundational pose that offers several benefits, from enhancing physical strength to improving mental clarity. Over the years, I’ve come to realize how integral this pose is to yoga, both for its physical attributes and its symbolism of balance and harmony.
The Origin and Significance of Trikonasana
Trikonasana comes from the Sanskrit words “Trikona,” which means triangle, and “Asana,” meaning pose or posture. The name itself perfectly describes the shape formed by the body during the practice, resembling a triangle. As someone who has practiced yoga for years, I’ve found that Trikonasana is a versatile and accessible posture, ideal for beginners but still effective for experienced practitioners.
When I first started practicing, the simplicity of the pose intrigued me. It’s a standing pose that requires a wide stance and extended arms, creating a perfect alignment through the legs, torso, and arms. This alignment is essential for the benefits that this pose provides, and I’ve found that the more attention I give to precision and form in this pose, the more deeply I can feel its effects.
How to Perform Trikonasana
The first time I attempted Trikonasana, I thought it would be easy. But soon, I realized that its simplicity belies the strength, flexibility, and awareness needed to perform it correctly. Here’s how I break it down in my practice:
Step 1: Start in Tadasana
Begin in the standing posture called Tadasana, which means “mountain pose.” Your feet should be grounded firmly on the mat, hip-width apart. Stand tall, with a long spine and your arms by your sides. This is where you establish your stability before transitioning into Trikonasana.
Step 2: Step Wide Apart
From Tadasana, step your feet about 3 to 4 feet apart, depending on your body and comfort level. Turn your left foot out to the left at a 90-degree angle, and your right foot should remain facing forward. This alignment is crucial for the next steps.
Step 3: Extend Your Arms
Next, extend your arms out to the sides so that they’re parallel to the floor. Your palms should face downward, with your fingers spread wide. This position helps to engage your arms and shoulders, and it’s important to keep your arms aligned with your shoulders throughout the pose.
Step 4: Reach and Bend Toward Your Front Leg
On an inhale, lengthen your spine and engage your core. As you exhale, begin to bend your torso toward your front leg. You’ll reach out over your right leg, keeping your body long and maintaining alignment through the torso and legs. This is where the triangle shape starts to form.
Step 5: Place Your Hand
Once you’ve reached as far as possible, place your right hand on your shin, ankle, or the floor—whichever feels accessible while maintaining alignment. My personal preference is to place my hand on my shin, but if you’re more flexible, you might reach the floor. The goal is to keep the body long and prevent collapsing the chest.
Step 6: Lift the Left Arm
As you stabilize your body, rotate your torso and lift your left arm straight up toward the ceiling, making sure to keep your shoulders stacked above one another. Gaze toward your left hand or straight ahead, depending on what feels most comfortable for your neck. Hold the pose for several breaths, keeping both legs strong and engaged, and your core active.
Step 7: Return to Standing
When it’s time to come out of the pose, slowly lower your left arm, engage your core, and use your legs to lift your torso back to standing. Repeat the process on the other side, turning your feet and arms in the opposite direction.
Step 8: Repeat and Refine
The more I practiced, the more I understood how small adjustments can improve the depth of the stretch. Over time, I’ve come to refine my Trikonasana practice by focusing on small but important details, like keeping my chest open and maintaining the alignment of my feet, legs, and arms.
Why Trikonasana Is Important in Yoga Practice
At first glance, Trikonasana might seem like a basic posture. But over time, I’ve learned that it offers so much more than just a stretch. It’s a posture that builds strength, flexibility, and balance, and it’s also deeply grounding for the mind.
Physical Benefits of Trikonasana
The physical benefits of this pose are undeniable. Trikonasana engages multiple muscle groups, from the legs to the arms, core, and back. I’ve found that regularly practicing this pose has improved my flexibility, particularly in my hips and hamstrings, and it has helped to open up my chest and shoulders.
By working through the stretch and strength in this posture, I’ve also noticed a significant improvement in my ability to maintain balance. Trikonasana forces you to ground yourself through your legs, which enhances proprioception—the sense of where your body is in space. As a result, I’ve found that this pose enhances my stability in other yoga postures as well.
Mental and Emotional Benefits of Trikonasana
What I’ve come to realize is that Trikonasana is also a wonderful pose for mental clarity. It forces me to focus intently on my body’s alignment, which often helps me clear my mind of distractions. This focus is especially useful for reducing stress and anxiety. When I’m in the pose, I feel a deep sense of grounding, and this feeling extends beyond the mat.
I also believe that Trikonasana symbolizes balance in life. The triangle shape formed by the body in the pose represents stability, and holding the posture teaches me how to find balance not only physically, but also mentally and emotionally. Over time, I’ve found that the calm and focus cultivated in this pose helps me manage my day-to-day challenges with a clearer mind.
Common Mistakes to Avoid in Trikonasana
As with any yoga pose, it’s important to avoid certain mistakes that can hinder the benefits of the posture. Here are a few common mistakes I’ve observed in my practice and in the practice of others:
Rounding the Back
One of the most common mistakes in Trikonasana is rounding the back when reaching forward. Instead of bending at the waist and rounding the spine, try to lengthen your spine as you hinge forward. This will help you avoid strain in your lower back and will allow for a more effective stretch in the torso.
Misaligning the Feet
Another mistake is not properly aligning the feet. Make sure that your feet are in a strong position, with the front foot pointing directly forward and the back foot angled slightly inward. Misaligning the feet can create instability and make it harder to balance in the pose.
Collapsing the Chest
It’s easy to collapse the chest and round the shoulders when reaching for the floor. I’ve found that keeping the chest open and the shoulder blades drawing down the back is key to maintaining the integrity of the pose.
Conclusion
Trikonasana, or Triangle Pose, is a core pose in yoga that offers a multitude of benefits for the body and mind. Through my years of practice, I’ve come to deeply appreciate the strength, balance, and flexibility it fosters. Not only does this pose work on improving my physical alignment, but it also brings me a sense of calm and grounding. Whether you’re a beginner or an experienced yogi, incorporating Trikonasana into your practice is a wonderful way to enhance your yoga journey. With consistent practice, I believe you’ll discover its transformative effects on both the body and mind.
How to Build a Consistent Yoga Practice for Beginners
Beginner Yoga Guide: Top 5 Essential Poses to Get You Started

The Truth About Teaching Yoga Poses You Can’t Do

How Social Media Is Transforming Yoga—for Better or Worse

Cheap Ways to Stay Fit This Summer

Perfecting Your Yoga Poses: A Journey of Growth
Yoga for Flexibility: My Personal Story of Gaining Freedom in Body and Mind
The Truth About Teaching Yoga Poses You Can’t Do

Types of Yoga Teachers in Modern Times

Tips to Lead a Successful Yoga Audition

Who is a Dedicated Yoga Practitioner?
